Suspension Systems

Installing suspension lift kits and components is one of the most common upgrades in the 4x4 industry. It’s crucial to use proper tools to ensure safe installation and correct torque, as suspension parts directly affect vehicle handling and safety. IRONMAN 4X4 suspension systems, such as Foam Cell Pro, Nitro Gas, and ATS kits, are engineered as bolt-on upgrades for specific makes and models, with all necessary brackets and hardware included for a seamless fit. Here are the must-have tools and tips for suspension installs:
- Vehicle Lifting Equipment: A hydraulic floor jack or vehicle lift, plus load appropriate jack stands, to safely raise and support the truck during the install.
- Impact Wrench and Sockets: To quickly remove stubborn bolts (like shock mounts and U-bolts). An impact gun speeds up teardown, but always switch to a torque wrench for final tightening to spec.
- Torque Wrench: Critical for tightening suspension fasteners (control arms, spring hardware, etc.) to manufacturer specifications. This ensures proper clamping force and prevents overtightening or under-tightening. Suspension bolts should be torqued to spec with the vehicle at ride height for accurate bushing preload.
- Coil Spring Compressor: If installing a kit that reuses or replaces coil springs (e.g. strut spacers or new coilovers without pre-assembled struts), a quality spring compressor is necessary. This tool safely compresses coil springs during removal and installation.
- Alignment Tools or Services: After any lift installation or adjustment, a wheel alignment is needed. While a professional alignment machine is ideal, basic tools like camber/caster angle gauges or marking paint can help you get alignment close enough to drive to an alignment shop. Many IRONMAN kits include alignment correction parts (like adjustable camber bolts or recommend upgraded upper control arms) to dial in factory specs after the lift.
Pro Tip: When installing new shocks, control arms, or leaf springs, leave all pivot bolts loosely fitted until the vehicle is lowered to its normal ride height. This allows the bushings to settle in a neutral position. Once the weight is on the wheels, tighten all suspension bolts to spec. This prevents bushing bind and ensures a longer lifespan for your new suspension components.
IRONMAN 4X4 suspension kits are designed for easy fitment. For example, the brackets and mounting points line up with factory holes, meaning no welding or fabrication is required. Each kit comes with model-specific components, like appropriately valved shocks and weight-rated springs, and all required hardware. The result is a bolt-on install that enhances performance without undue hassle. Having a tall jack or pole jack on hand can help maneuver solid axles or independent suspension arms when swapping coils and shocks. And don’t forget to reconnect or adjust any brake line brackets or sensor wires (ABS, etc.) that were removed during the install.
Bumpers

Upgrading to heavy-duty off-road bumpers adds protection and functionality, winch mounts, light mounts, recovery points, but also means handling large steel components. In a busy shop, the right tools and techniques will make bumper installations much more efficient. IRONMAN 4X4 bumpers – whether the Raid Series, APEX Series, or other models – are crash safety tested and certified, airbag compatible, and engineered for direct fit on specific vehicles. They feature a direct, bolt-on installation and include all the necessary brackets and hardware for a seamless and trouble-free setup. Key tools and tips for bumper installs include:
- Helper or Lifting Device: IRONMAN bumpers are robust steel units often weighing 100+ lbs. Use a second person, or an engine hoist, transmission jack, etc., to support the bumper during positioning. This ensures you can line up mounting holes without straining yourself or risking a drop.
- Full Socket & Wrench Set: A mix of metric and SAE sockets/wrenches (depending on vehicle) to remove factory bumper bolts and install the new hardware. An impact wrench is handy for removing old bumper bolts and snugging new ones, while breaker bars help with any rusted fasteners.
- Torque Wrench: Once all bolts are in place, use a torque wrench to tighten the main mounting bolts to the specified torque. This is important for safety, especially on recovery points and winch cradle bolts. IRONMAN provides torque specs for the hardware in their installation guides.
- Trim Removal Tools & Cutting Tools: Most modern trucks have plastic bumper covers, inner fender liners, or trim that must be removed or trimmed to fit an aftermarket bumper. Have plastic clip removal tools to pop out retainers without damage. For minor trimming, as is occasionally required for the best fit, use a body saw, Dremel tool, or sharp utility knife with steady hands. Always “measure five times, cut once” when trimming fender plastics for a new bumper fitment.
- Level and Tape: It’s wise to put painter’s tape on adjacent body panels to prevent scratches during test-fit and use a level or tape measure to ensure the bumper is aligned evenly side-to-side and at the correct height before final tightening.
Pro Tip: When mounting the bumper, start all bolts by hand without fully tightening them. This allows you to adjust the bumper’s position to achieve proper alignment with the body. Once you’re satisfied with the fitment, gradually tighten all the bolts. Proper alignment is usually achieved by keeping bolts slightly loose and adjusting the bumper, then tightening fully once everything lines up. This technique prevents any binding or misalignment that could occur if you torque down one side too early.
IRONMAN 4X4 bumpers make the installer’s life easier by utilizing factory mounting points and including vehicle-specific brackets. For example, the IRONMAN 4x4 APEX Series front bumper (SKU: BBP109AK) for the 2021+ Ford F-150 comes with a separate winch cradle that bolts directly to the chassis, and a bumper shell that attaches in a two-stage process. All required high-tensile hardware, support brackets, and even integrated light units are included in the kit. The bumper is direct bolt-on with no drilling required, aside from trimming a small piece of fender flare for perfect fit on that model. As a result, the installation is “seamless and trouble-free”, often completed with basic hand tools in a couple of hours. Always follow the product’s instructions, and keep an eye out for extras like fog light harness extensions or parking sensor mounts that may be included in the kit to retain all OEM functions.
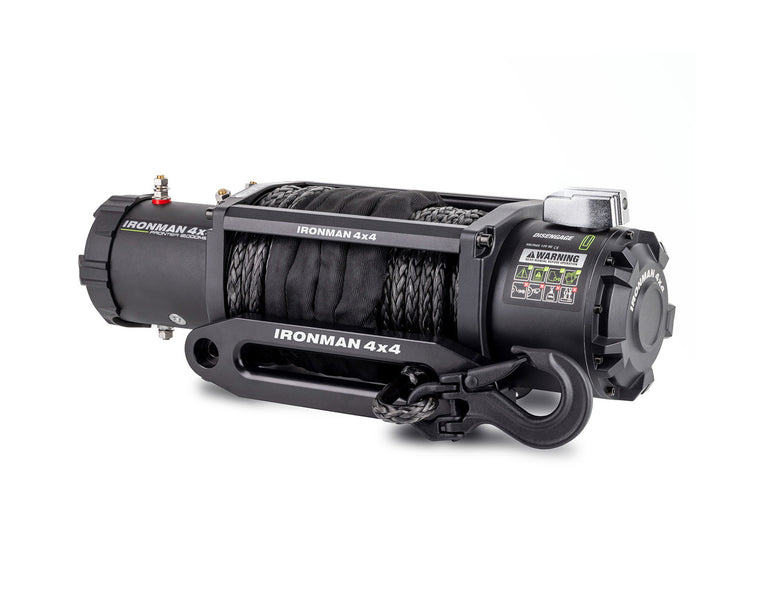
Winches

Winches are one of the most valuable recovery tools, and installing a winch requires both mechanical and electrical know-how. In a shop setting, you’ll want tools that help seat the winch securely on its mount and properly connect it to the vehicle’s electrical system. IRONMAN 4X4’s Frontier series winches are designed with installation in mind, they feature a universal 10″ x 4.5″ bolt pattern that fits most winch-ready bumpers or mounting plates, and they include complete wiring harnesses, control boxes, and hardware for a straightforward setup. Here are the must-haves for winch installs:
- Socket Wrench Set with Extensions: Winch mounting bolts often thread from underneath or behind the bumper’s winch tray. Use appropriate sockets (typically 3/8″ or 1/2″ bolts on winches) with extensions or wobble adapters to reach the bolts in tight spaces. A ratcheting box-end wrench can also be a lifesaver for the innermost bolts where a socket won’t fit.
- Torque Wrench: Winch mounting hardware should be torqued to spec, commonly around 40-60 ft-lbs, depending on bolt size, to ensure the winch is securely fastened for heavy pulls. Use grade 8 or 10.9 hardware as provided. After the first use or two, it’s wise to re-check these bolt torques.
- Electrical Tools: Since winches draw high current, safety and solid connections are paramount. IRONMAN winches come with heavy-gauge power cables pre-terminated with lugs, so usually you won’t need to crimp anything major. However, you will need a wrench, often 13mm or 1/2″, to attach the power cables to the winch and battery terminals. Keep a cable cutter/stripper and crimp tool handy in case you are routing to an auxiliary fuse block or need to shorten cables. A multimeter or test light is useful for verifying power and ground connections once installed.
- Cable Management Supplies: Have zip ties, cable loom, and grommets available. Secure the winch’s power cables away from hot engine parts or sharp edges. If passing the wired remote connector into the engine bay or cab, use a rubber grommet in any firewall holes to protect the wiring.
- Solenoid Placement: Decide where to mount the winch control box (solenoid pack). IRONMAN winches allow the control box to be mounted on top of the winch or remotely. Use the supplied bracketry and secure it where it’s protected yet accessible for plugging in the handheld controller when needed.
Pro Tip: If you’re installing a winch and an aftermarket bumper together, it’s often easiest to mount the winch to the bumper or winch tray before bolting the bumper onto the vehicle. This gives you more room to tighten the winch bolts and connect the wiring. Once the winch is secured on its tray and the electrical connections are made (except the battery, leave that for last), you can lift the whole assembly into place on the vehicle. Don’t forget to connect the winch’s positive cable to the battery and the negative cable to a proper ground as the final step, and double-check that the winch operates (in and out) with the provided controller before finishing up the job. This way, any wiring issue can be addressed while everything is still accessible.
IRONMAN 4X4 winches are very installer-friendly. As noted, the standard mounting footprint fits directly in IRONMAN 4X4 bumpers’ winch cradles and most other winch bumpers. All the necessary items are in the box, no “mystery bolts” or extra purchases needed. It’s a good practice to apply a dab of medium-strength threadlocker (blue Loctite) to the winch mounting bolts during installation, given the vibrations and loads these bolts will endure. After installation, spool out and re-tension the line under light tension to ensure tight, even wraps on the drum, and you’re ready to confidently send your customer off-road with their new winch.
Steps & Armor

“Steps & armor” covers a range of bolt-on protection, including side steps, rock sliders, underbody skid plates, side rails, and more. These parts protect the vehicle and make it more practical, such as for navigating off-road obstacles and providing additional jacking points. For a shop, the challenge is that every vehicle’s frame and undercarriage can be a bit different, so having versatile tools is key. The good news: IRONMAN 4X4 designs its armor products to mount using factory holes or clamp locations whenever possible, minimizing the need for drilling. For example, the Raid Series Side Steps and most skid plate kits use a no-drill, bolt-on installation with all hardware included. Here are must-have tools and tips when fitting side steps, rock sliders, and skid plates:
- Rivnut (Nut Sert) Tool: While IRONMAN 4X4 heavy-duty steps often utilize existing frame holes and body mounts, occasionally you may need to install a rivet nut into a frame rail or body pinch seam, some vehicle models may not have threaded inserts from factory. A professional rivnut installation tool, handheld or pneumatic, is a must for any shop doing armor installs. It allows you to securely add threaded inserts for bolts where only a plain hole existed. For example, if a rock slider requires adding an insert into the frame for an extra bolt, a rivnut gun will do it in seconds with a solid clench. Always match the rivnut size/material to the bolt and thickness of metal – typically M8 or 3/8″ steel rivet nuts are common in off-road armor kits.
- Drill and Metal Bits: In case drilling is needed, for instance, some universal skid plates might ask for a pilot hole for a self-tapping screw or a rivnut, have a good corded or cordless drill on hand with sharp cobalt bits. Use center punches and step-drill bits to make clean holes. Remember to paint or seal any exposed metal after drilling to prevent rust.
- Breaker Bar / High-Torque Impact: Body mount bolts, used for mounting rock sliders or side steps, can be extremely tight and often have thread locker from the factory. A long breaker bar or a high-torque impact wrench will help crack these loose. Make sure the vehicle is firmly supported, as removing body mount bolts can sometimes shift the body slightly.
- Floor Jack or Stands: When positioning heavy skid plates or sliders, a jack or adjustable stand can be your “extra pair of hands.” For example, use a floor jack with a wood block to hold a transfer case skid plate against the frame while you line up the bolts. Or support one end of a 6-foot rock slider on a jack stand while you start the front bolts on a Tacoma – then move to the rear. This prevents wrestling awkwardly with heavy steel parts.
- Combination Wrenches & Ratchets: Many side steps use bolt plates or brackets that go inside the frame, with nuts that must be tightened in tight quarters. Have a variety of wrenches, including ratcheting box wrenches, to reach inside frame rails or between body and frame. Gearwrench-style ratcheting wrenches are excellent for speeding up the tightening of slider mounting bolts once loose-fit.
IRONMAN 4X4’s side steps and skid plates are built for easy installation and long-term durability. The Premium Side Steps for the 2022+ Tundra CrewMax (SKU: SSP098K), for example, use the Tundra’s factory frame mounts with a no-drill, bolt-on installation. All the necessary brackets and hardware are included for a hassle-free fitting. Simply remove the factory body mount bolts, position the step, and reinstall the bolts with the provided hardware, this can be done in as little as an hour since everything lines up by design. Similarly, the Heavy Duty Skid Plate Kit for Toyota 4Runner (SKU: UBP047) uses existing threaded mounting points under the truck. The kit comes with recessed head high-tensile bolts and all spacers/brackets needed, so it bolts on directly using the factory locations and creates a smooth, snag-free underside. Because the hardware is recessed and included, you don’t have to go find special low-profile bolts or worry about them shearing off on rocks – IRONMAN has already figured that out.
When installing skid plates, leave all bolts loose until all sections of the skid system are in place (front, transmission, t-case skid, etc.), then go back and tighten everything. This helps with alignment of overlapping plates. For side steps or rock rails, make sure they are evenly spaced from the rocker panel along their length before torquing down. A common trick is to use a few pieces of cardboard or wood as shims between the step and the body to get consistent spacing while you tighten the bolts. Once installed, remind the vehicle owner or your shop staff to re-check the step and armor mounting bolts after a few off-road trips – hardware can settle or slight movement can occur, and snugging them back up will guarantee the armor stays put.
Lighting

Aftermarket off-road lighting is another area where having the right tools can make the install go smoothly. Whether you’re wiring up a pair of 9″ driving lights, an LED light bar, or ditch lights, you’ll be dealing with vehicle electrical systems and delicate vehicle interiors. IRONMAN 4X4 lights are designed for easy integration, most of the lighting products come with complete plug-and-play wiring harnesses (including relays, fuses, and switches) and vehicle-specific mounting solutions. To outfit your shop for lighting installs, make sure you have the following:
- Wire Crimpers and Strippers: Quality crimping tools are essential for making reliable electrical connections. While light kits often include a harness with Deutsch connectors and terminals pre-crimped, you may still need to crimp on a ring terminal for the battery connection or tap a trigger wire. Use the correct gauge slot on your crimper for a solid crimp, and strip wires cleanly to the right length to avoid stray strands.
- Soldering Iron and Heat Shrink (Optional): Some installers prefer to solder certain connections, like splicing into an existing circuit for a backlight or DRL trigger. A soldering iron and heat shrink tubing can provide a very secure, weather-resistant connection. This might be above and beyond for basic installs, but it’s good to have for custom work.
- Multimeter or Test Light: When integrating with a vehicle’s electrical system, it’s important to verify circuits. A multimeter helps find a true 12V ignition source or test continuity. For example, use a test light to find the parking light wire if you’re tying in an auxiliary light’s backlight feature, or to ensure your chosen fuse tap actually turns off with the ignition. This prevents draining the battery inadvertently.
- Panel Trim Tools: Running wiring for lights often requires removing interior trim pieces (to mount a switch or route a wire through the firewall grommet behind the dash). Plastic trim removal tools let you pop A-pillar covers, dash panels, or kick panels without scratching or breaking them. This is especially useful when mounting something like the switch that comes with an IRONMAN light harness – you’ll likely route it into one of the switch knockouts in the dashboard.
- Cable Management: Have an assortment of zip ties, adhesive-backed mounts, wire loom, and grommets. A clean install is the mark of a professional. Secure all harnesses away from moving parts (steering shafts, pedals) and hot spots (exhaust, radiators). Use grommets when passing wires through any metal firewall or body panel to prevent chafing.
IRONMAN 4X4 makes the electrical side as plug-and-play as possible. For instance, the SCOPE 9″ LED Driving Lights (SKU: IDL0901K) come as a kit that includes two lights, mounting brackets, and a dedicated wiring harness. The harness is an easy-fit loom with high-quality connectors and an in-cab switch, designed to work with both positive or negative switched vehicles. It even has a built-in LED indicator on the switch for a factory-look installation. This means you don’t have to fabricate a relay harness from scratch – simply route the provided harness, connect the Deutsch plugs to the lights, connect the ring terminals to battery + and -, and plug in the switch. The heavy lifting (sizing wires, adding a fuse and relay) is done for you. As a result, essential wiring tools are minimal: you might only use a wrench to attach power leads to the battery and some zip ties to tidy everything up.
When mounting the lights themselves, common tools will be a box-end wrench or socket to tighten the mounting nuts on the light brackets. IRONMAN lights use stainless steel hardware and often a single bolt mount with a nylock nut – straightforward to attach to bumper tabs or roof racks. If you’re installing a roof light bar or scene lights, you may need a drill to mount brackets if the rack isn’t pre-drilled. Always double-check the placement and angle before drilling, and use rust-inhibiting paint on any new holes.
Pro Tip: Aim the auxiliary lights in a controlled environment after installation. For driving lights or light bars, a flat surface and wall can help set the correct beam pattern. A general guideline is to aim driving lights so that their beam hotspot hits the ground about 100–150 feet ahead of the vehicle, and ensure they are slightly toe-in towards the road centerline for pair of spot beams or flat for combo beams. This prevents blinding oncoming drivers and maximizes useful illumination. Also, if the lights have a DRL (daytime running light) or backlight feature, consider using an add-a-fuse tap to tie that circuit into an ignition-on source such as the fuse for daytime running lamps or another ignition powered circuit. This way the accent lighting comes on automatically with the vehicle and you maintain a clean OEM-style integration. With the comprehensive wiring kits IRONMAN provides, these integrations are relatively painless for a skilled installer.
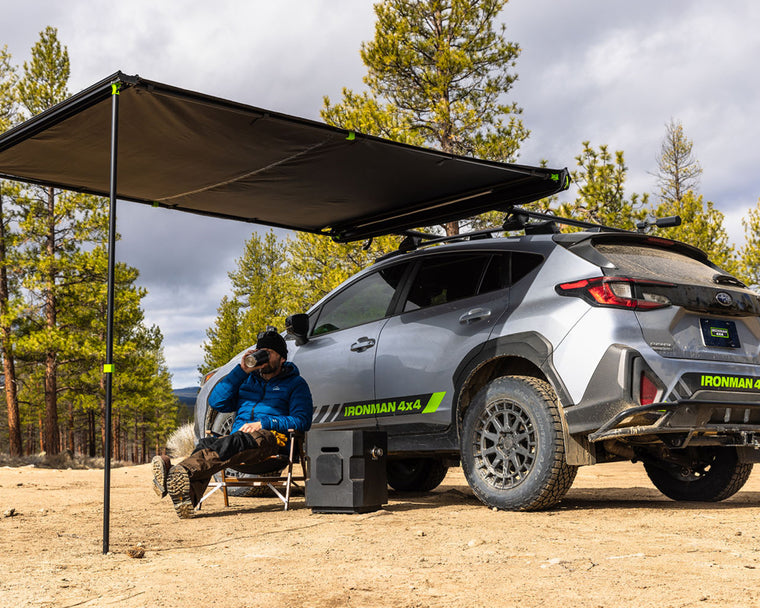
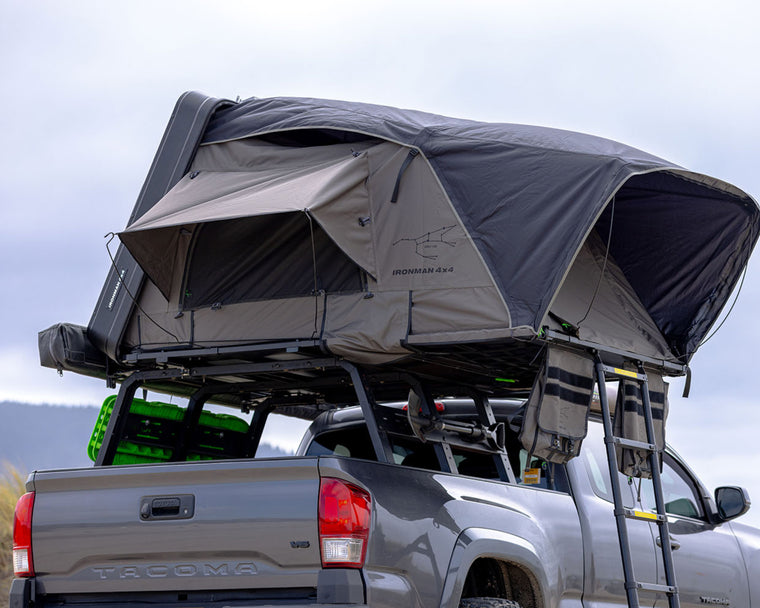
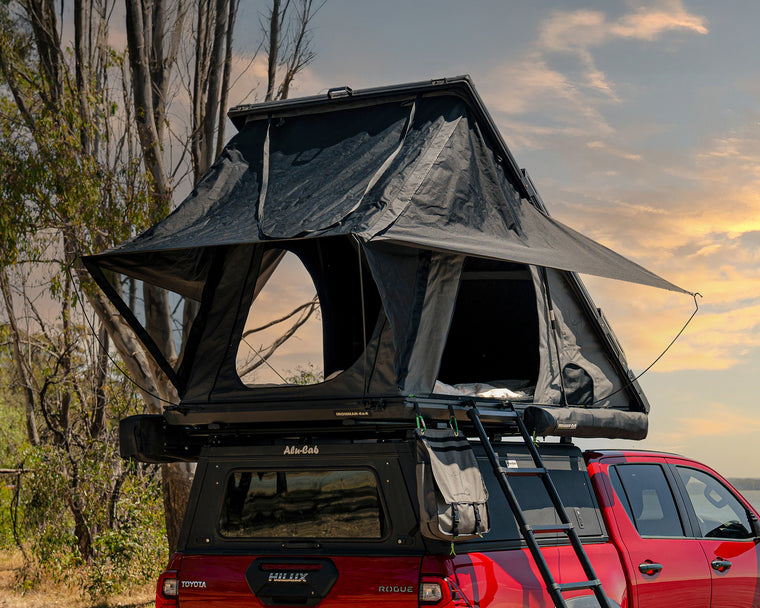
Rooftop Tents & Awnings

Lastly, for camping-focused accessories like rooftop tents and awnings, the installation is more mechanical (no wiring, except possibly for LED strips in some tents). However, the size and weight of items like rooftop tents mean you need the right approach in a workshop to do it safely and efficiently. IRONMAN 4X4 rooftop tents, such as the Orion or Ursa hard shell tents and Cross soft shell tents, and the DeltaWing awnings are built for easy fitment to common roof rack systems. They include all necessary mounting hardware, brackets, bolts, plates, etc., to attach to crossbars or roof racks. Here’s what you’ll want to have on hand for tent and awning installs:
- Ladders or Work Platforms: A rooftop tent can weigh 120–150 lbs and is bulky. Use step ladders or a work platform to gain comfortable access to the vehicle’s roof. It’s best to have at least two people lift and position the tent. In a shop, if available, a ceiling hoist or fork lift with padding can also hoist the tent onto the roof rack.
- Basic Wrench/Socket Set: Most tents and awnings use standard hex-headed bolts (often M8 or M10) with nyloc nuts for mounting to racks. Typically a 13mm or 14mm wrench/socket will fit the nuts. Have both ratchets and open-end wrenches ready (one to hold the bolt, one to turn the nut). Tent mounting kits often include square-head bolts that slide in the tent’s base rails and go through your rack, with nyloc nuts on the other side – a 13mm deep socket and an extension can be helpful to tighten those nuts deep between roof rack slats.
- Measuring Tape: Before fully tightening a tent or awning, measure its position side-to-side and front-to-back. This ensures it is centered on the vehicle (for aesthetics and balance) and that overhangs (like how far the tent opens to the rear or side) are where you want them. Awnings should typically be mounted toward the rear of the vehicle, but ensure the swing of doors is clear. A quick measurement can save having to reposition later.
- Allen Keys (Hex Keys): Some mounting kits use hex socket button-head screws for clamping brackets or accessory channels. For example, awning brackets might use hex bolts. A set of metric Allen wrenches, or better yet hex bits for your ratchet, will be useful.
- Thread Locker: Applying a medium-strength threadlocker to tent mounting bolts is a good precaution. Roof tents undergo a lot of vibration (corrugated roads, wind) and while nyloc nuts generally hold, a bit of threadlocker can add insurance that nothing loosens over time. Remind customers (or note in install records) that if they ever want to remove the tent, a breaker bar might be needed due to the threadlocker – but that’s better than a tent sliding on the rack!
IRONMAN 4X4 rooftop tents and awnings are designed for easy, repeatable installation, meaning a dealer can mount and dismount display units or customer units with minimal fuss. All products come with a complete mounting kit, so you’re not left searching for extra parts. The “hardest” part is lifting the tent onto the roof, but with two people it’s straightforward. Pro tip: leave the tent closed with the cover on during installation – it’s more rigid and compact to handle that way. Once mounted, go around and tighten each fastener securely; nothing on the tent should be wobbly or loose once opened up.
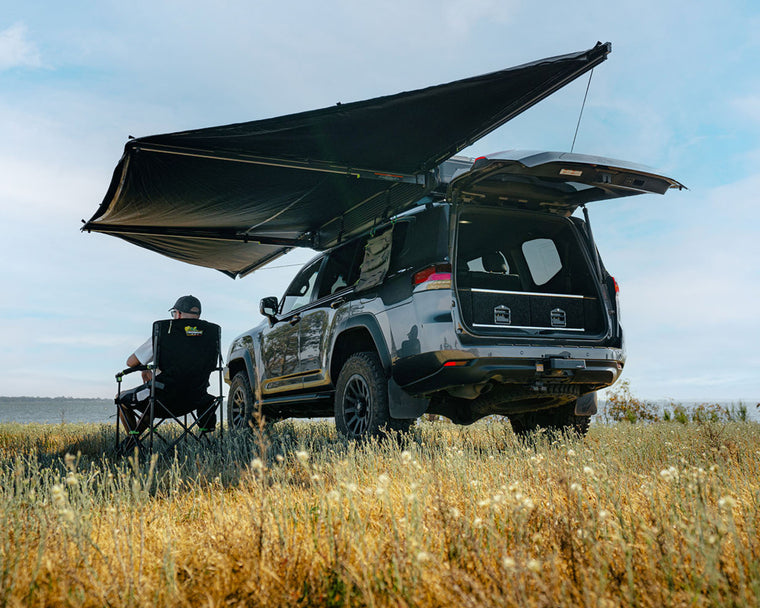
For awnings, IRONMAN provides heavy-duty L-brackets that attach to most roof rack side rails. These usually use u-bolts or bolts/nuts to clamp the bracket to the rack, and then bolts to attach the awning to the bracket. It’s a one-person job to bolt the brackets onto the rack, but mounting the awning to the brackets is easier with two people – one to hold the awning in position, the other to insert bolts. Awnings are lighter (20–40 lbs) but long and a bit awkward. IRONMAN’s awning kits also come with all hardware needed for typical installations.
One accessory that’s incredibly useful for dealer workshops is IRONMAN’s Quick Release Awning Bracket kit (SKU: IAWNINGQR). This system allows you to mount a 90° awning to a vehicle’s rack with a quick-release mechanism. In a shop environment, that means you can attach or detach an awning in minutes – great for moving an awning between a showroom display and a shop vehicle, or if a customer wants to easily remove their awning when not in use. The quick-release kit consists of mounting hooks and latches that secure the awning firmly for off-road use but unlatch without having to undo all the bolts. It’s a worthwhile add-on to keep in stock, as many customers appreciate the flexibility.
Before finishing a tent or awning job, double-check every fastener, and if the tent has a travel cover or the awning has a storage bag, ensure it’s zipped up and secured. If the tent has a power cord for an internal light or fan, route it safely. Finally, explain the setup/tear-down procedure to the customer, or your sales team if it’s a showroom rig – this isn’t a tool per se, but knowing how to use the product is part of a successful installation hand-off. In summary, equipping your shop with the right tools and leveraging the clever design features of IRONMAN 4X4 rooftop tents and awnings (like included hardware and universal mounting) will make these camping accessory installs a straightforward task.
Conclusion
In a professional off-road shop, efficiency and precision are everything. By investing in these must-have installation tools and accessories, from heavy-duty impact wrenches and rivnut guns to quality wiring crimpers and lift assists, you’ll set your team up to perform installs that are both quicker and higher quality. IRONMAN 4x4’s product range is built with the installer in mind: vehicle-specific fitment, bolt-on designs, complete hardware kits, and thoughtful features all help reduce the need for guesswork and modifications during installation. A fully equipped shop, combined with the plug-and-play nature of IRONMAN’s kits, means happier technicians and satisfied customers driving away with confidence in their new gear.
By following the tips outlined for each product category, dealers and mechanics can avoid common pitfalls (like misaligned bumpers or messy wiring) and instead deliver clean, professional results. Always refer to IRONMAN 4X4’s official installation guides and torque specifications for the final word on each install. With the right preparation and tools, your shop can handle everything from a basic suspension lift to an overland accessory build-out with ease. Keep your toolboxes stocked and your knowledge sharp – and every installation will be an opportunity to showcase your shop’s craftsmanship and expertise in outfitting the ultimate off-road machines.